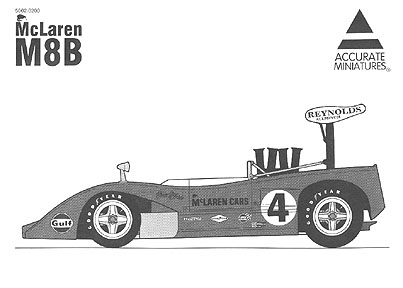
This is the first in a series of articles providing tips and suggestions for building the new Accurate Miniatures McLaren M8B. I offer these tips to help you through the building process. Please send in any suggestions you have to improve or expand these articles.AM McLaren - The Long Wait is Over
After hearing about this kit for over two years, it's finally arrived. And it is impressive in the box. Well-packaged and cast, and including more parts than some larger scale kits. But what makes this kit great is that it is designed for people who build models. For example, where is all that chrome? Luckily, it's missing. Accurate Miniatures knows that serious modelers would strip off chrome plating anyway. So let's thank them for leaving it off and saving us the trouble.But looking inside the box is just the beginning. If you have the kit you can already see for yourself. Let's start building it.
Read Those Instructions
Before you tear into this kit, take an evening to go through the instructions and plan your build. It helps to decide before you start how much detail to include, how to display the car, what painting techniques to use, etc. For example, these tips will be for Out of the Box builds. No aftermarket parts are needed to complete this kit. If I think they are needed to improve the results, I'll let you know. If you decide on super detail, great. Then you can expand on the following basic tips.Getting Started
I build all car models in the following order:1. Prepare and paint bodyworkThe first two steps take the most time. The rest of the process seems to fly by after I'm done with the prep and painting steps. But these are the steps that separate a good model from a great one.
2. Prepare and paint all other parts
3. Assemble parts (in instruction sheet order)
4. Apply decals
5. Final detailingStep One: Preparing and Painting the Bodywork
For this car, your paint choices are a bit limited. The instructions recommend MCW automotive paints No. 2070, McLaren Orange. I have a bottle of it already, so that's what I'll use. MCW also offers 4oz. spray cans of this color.I've heard all the arguments back and forth about what color these cars were. The fact is that the color is impossible to replicate in print, video, or online. You had to see it up close to really know what it looked like. And people who saw it say it was a very bright papaya color, not a muddy mustard version of school bus yellow. In any case, I've tested the MCW color and it looks great.
You'll need a good automotive sandable primer. I've used Plasticote with good results, but Duplicolor and Krylon are also good. Pep Boys, the local auto parts shop, carries a brand called Varsity that also works well. Primer is really easy to put on, and you have to have a really heavy hand to screw it up. Just apply it lightly and you'll be happy.
What color primer should you use? This is definitely a personal preference area, but I'm told it can really affect your results. Gray primer shows bodywork flaws better than anything. A sink mark you missed without priming shows up very clearly with gray primer. Trouble is that light, bright, colors don't cover gray very well. My solution is to prime lightly with gray, then follow-up with white primer over the gray.
Of course, if you're using hobby paint or acrylics mixed to order, you don't have to prime at all. But good luck getting a color match on this very special color.
Preparing the Body Parts for Painting
First, identify all the parts that make up the bodywork. They are:Examine each part to determine how much preparation it needs. The most obvious starting point is with the outer body pieces that come on their own sprue in a separate bag.
Part Number Description A11 right tub side A12 left tub side 2 left door panel 3 right door panel 1 nose panel A9 right lower nose cap A10 left lower nose cap A7 left inner fender shield A8 right inner fender shield 4 rear body panel A16L left rear wheel opening panel A16R right rear wheel opening panel A18 rear panel A15 left rear body hinge plate A14 right rear body hinge plate A5 engine cover 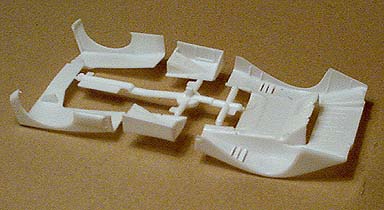
Part numbers: 4-rear body panel, 2-left door, 3-right door, and 1-nose
First, wash parts 1-4 (leaving them on the sprue for now) in warm water with a drop of dishwashing liquid to remove mold release. Let them air-dry or use a food dehydrator to completely dry these four parts. A quick look at these pieces reveals sharp casting with little flash, but several ejector pin marks that are either protruding or recessed.The pin marks you see above should be removed, even though they will be hard to see when covered by A9 and A10. The reason is that this surface has a nice texture that replicates the fiberglass. So the inner surfaces should all be finished as nicely as possible.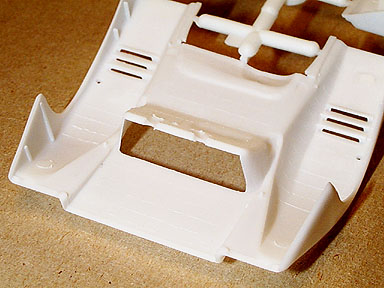
Pin marks are visible at the front and rear underside of the nose (Part 1).Pin marks aside, the bodywork needs little preparation. My rear panel is a bit warped from sitting in the box, but this can be easily corrected with a dip in hot water.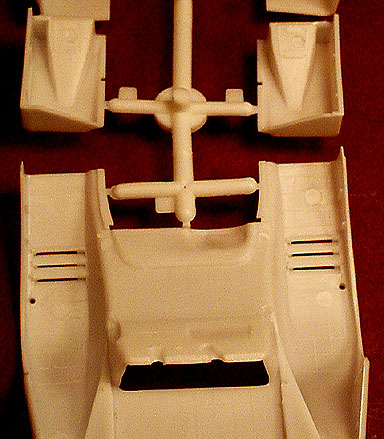
Sand or fill all the pin marks you see here (Parts 1, 2, and 3)
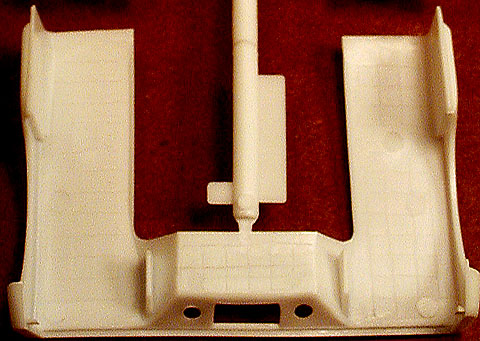
Part 4 needs work on the pin marks on both right and left undersidesI like to first prime the body parts with the sprue attached. Then after the first prime coat is dry I cut the piece from the sprue and clean up the attachment point. Then I spray primer over the attachment point along with other bodywork spots that need touching-up. Then you may see other places that need touching-up and repeat the process again.
(To be continued . . .)