
In order to make a little more room, I decided to dispose of a few of my completed models.
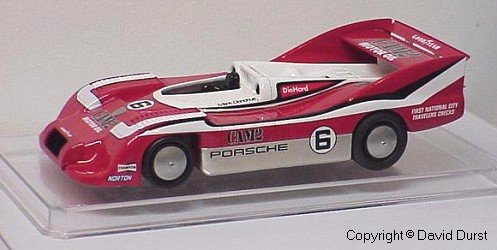
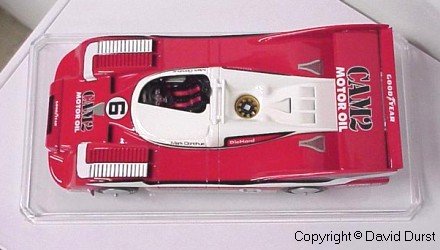
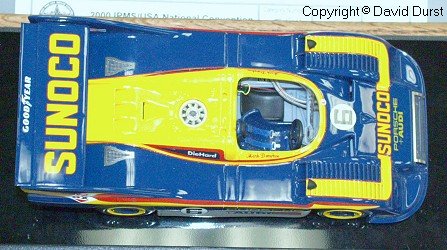
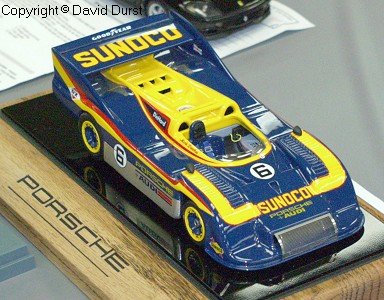
The Porsche 917-30 - Cam-2 car (and subsequently the 917-30-
Sunoco racer) was one I decided
to part with. I sold the car to someone who lives just a few miles from myself. Having never met him I
had no idea what to expect. After seeing the model in person and viewing some in my collection
he asked if I would be interested in building a 956 for him. I said sure without really
knowing what was to lay ahead. He quickly told me it was like the Tamiya kit only the stripes
on the front were a little different. Having only seen a picture of the nose of the car I
determined that the stripes would pose little difficulty in completing. About a week he
dropped off the Tamiya kit of the Porsche 956. I asked if he had any pictures of the 1:1
as my references were limited to pictures on the Internet. He responded that he had a few
pictures laying around he could bring over for me to use. Another week and visit later and
I have pictures of the car as raced in 1996 and a Minichamps reproduction to use as a
reference for the correct paint scheme. It was at this time that I got my first look at the
side and top of the car he wanted. I searched around and could not find the required decals
for the stripes. I considered briefly the possibility of reproducing the stripes as decals
but decided it would take a lot more work than simply painting them as required.
Now all I had to do was build this one-of-a-kind model. First for those who might
notice is that 956-001 is a short tail and the 956 by Tamiya is a long tail. After addressing
my concerns, the owner said he knew of the inaccuracy but wanted the car built as molded
by Tamiya because of it's excellent engine and suspension detail. The difference between a
long and short tail 956 is about ¼" in overall length and not enough to be apparent to
most people.
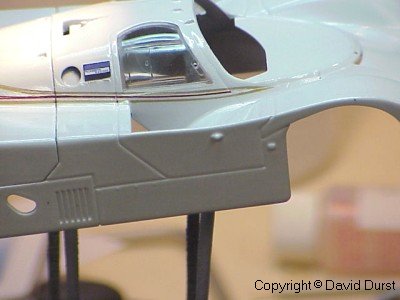
The difference in the rear spoiler height and side support configuration is a little
more apparent to those who are indeed fans of the 956/962. I think it is more accurate
to call them long nose and short nose as this is where the real change occurs. The more
accurate model kit overall is the Protar 956 endurance kit as the body proportions are
correct. The wheelbase of the Tamiya and Protar kits are very close to being identical
and it would take a little work to utilize the two kits to build a more accurate model, but it
could be done.
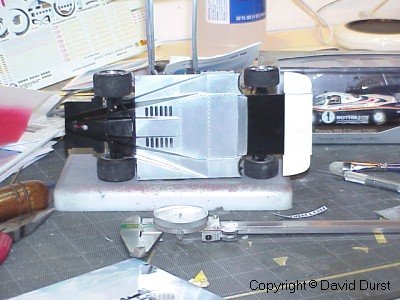
I chose very early in the build to use automotive lacquers for the body. I started
off with an epoxy primer (white). Very nasty stuff as it was very thick and didnt lay down
near as smooth as typical automotive primer does. Epoxy primer is very effective in sealing
the plastic, but leaves orange peel that must be sanded smooth prior to painting.
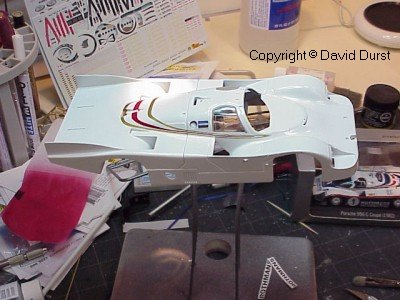
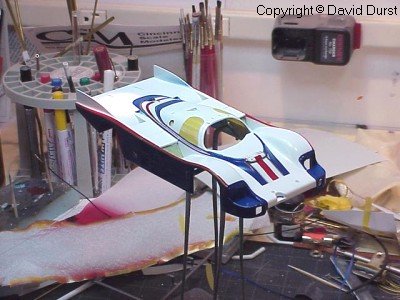
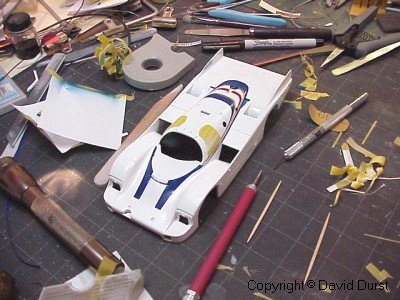
Body was primed and smoothed. A quick coat of white lacquer and its time to begin
the stripes. I first securely taped the two body parts together for the duration of painting.
The stripes were painted beginning with the center stripe and working out.
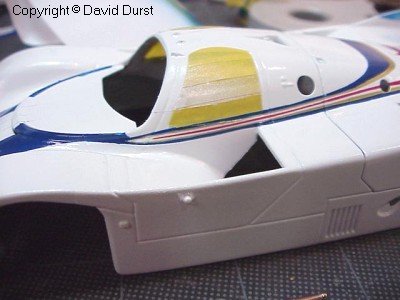
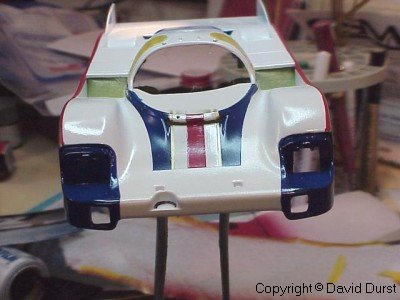
The nose art work was left for last. Each stripe was laid out by masking the area to be
painted and drawing the stripes on the masking tape with a pencil. The stripes were then
cut out of the masking tape with a sharp knife and the edges were burnished down with
a burnishing tool. After removing the masking tape and cleaning up any over spray or bleed
through, the stripe was sprayed with a very light coat of clear lacquer leaving a smooth and
continuous film over which to lay the next stripe.
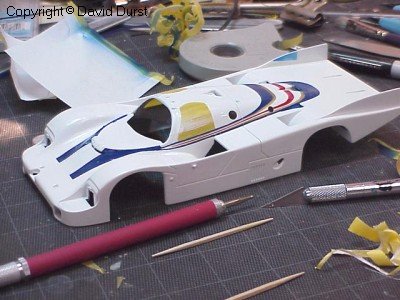
After all of the stripes on the top and nose of the car were completed, the stripes on the
sides were done in the same manner. Finally all of the colors were completed (of course I had
a couple of spots in the white paint where a speck of dust or a little over spray was missed
in the cleanup stages and had to be corrected) and after quick polishing, all of the stripes
were masked off for a final white coat.
One more layer of clear and it was time for the decals. So far the work had progressed
pretty well considering a total of 18 complete paint masks were applied to paint all of
the stripes, but the decals presented a totally new set of problems!

Almost all of the decals had to be custom made as those included with the kit were in
pretty poor shape and not correct for the car. A few hours of computer time and most of
the decals were ready to print. New roundels, Porsche markings, new Rothmans logo for
the nose 1996 etc...
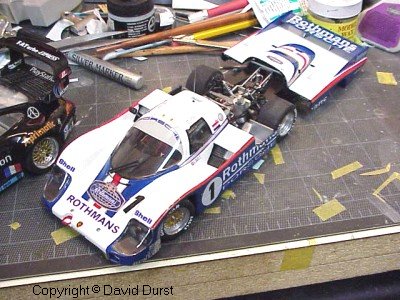
The list of the kit's decals used include the #1's, two Shell markings over the lights, Porsche windshield
decal, Rothmans logo on rear deck, Porsche emblem on nose, sponsor's at sides of light covers
just in front of the wheels and the drivers names below the door glass. Consessions to the "as
raced in 1996" car are top of door windows which were painted white under the driver's names.
Also the owners logo behind side windows, the "ROTHMANS" below logo on front cowl and not
seen is the word Dunlop below the front tow point. The wheels are from Tamiya's Toyota Tom's
84 C. These are accurate for the car as raced in 1996 as well as the Goodyear Tires. I used
tire markings from Slixx and painted the wheels with SNJ spray aluminum.
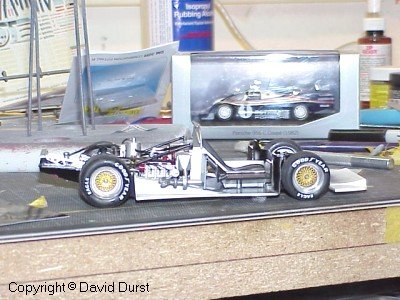
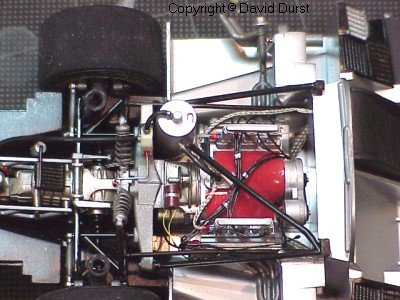
As for the engine it is mostly accurate. I did find a couple of things I would have changed
had I not been past the point of no return. The rear ducts and support structures were scratch
built from plastic pieces and aftermarket duct pipe. A couple engine braces were added as
well as some photoetched hose clamps etc...The finished car turned out pretty well considering.
As for Tamiya's kit. Mostly positive. A few parts in the engine bay required filling as they
were hollow on one side, but fit is good on most of the parts with the exception of the
headlamps and covers. Pretty good for a kit of this age, really.
I will say that this is a project that I would not have considered doing for myself as
the time and complexity is a little more than I am used to. Total time involved was around
80 hours + over 4 weeks. I did not keep accurate records but this is pretty close. Thanks
to a very nice set of pictures of the prototype, as well as the Minichamps car to guide me
with the accurate paint scheme, the project was mostly enjoyable. I learned a lot with regards
to painting fine lines and decal making and made someone very happy with a one of a kind
replica. Over 400 Megs of information for this car found it's way onto my hard drive in the
course of the month it took to build and have since been saved onto a cd for future use.
Included are the graphics files for the decals, scanned photos of the car construction
photos etc...
page created by Bill Via 10.31.00
E-mail: gpma@home.com
Archive Index