 |
 |
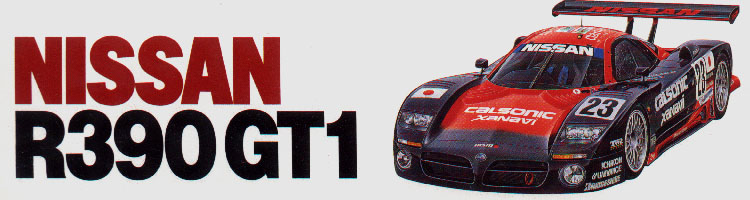
The Tamiya 1/24 Nissan R390 GT1 is much like the Porsche GT1 released last year. The kit does not have a high parts count, but it does have quite a bit of detail. The detail even surpasses the above mentioned Porsche kit. Tamiya had sponsor decals on the actual car, because of this, they went the extra distance on the details.I started the kit by prepping the body for painting. As usual with Tamiya kits, the mold lines were all that had to be sanded off. I started off by painting the red areas with Tamiya X7 red. After the red had dried thoroughly, I then masked off the red areas and painted the rest of the body using Tamiya X1 black. Tamiya supplies decals for the feathered areas of the paint scheme.
The red I used does not match the red on the decal sheet so I decided not to use the decals and do the feathering job myself. In fact I chose not to use any of the red or black decals from the kit. Instead I masked off the areas the decals would have been used, and cut out the decal pieces I would need. Doing the painting and masking this way gives the overall markings a much more realistic appearance with fewer decal lines. The only red that looks different is the large Nissan decal that goes on the rear wing.
There are decals to build 3 versions. The car I decided to build is the Brundle, Taylor, Muller #21 1997 Le Mans pole position car. The decal sheet is quite complete with all the proper markings as well as a few surprises. The sheet includes some underbody markings that you will not see once you have completed the kit. As with all Tamiya decals, everything went on with out any problems.
Once all the decals had thoroughly dried, I clear coated everything with Testors Model Master Clear coat. The extra effort of masking and painting was well worth it. The finished body looks great. The interior is a multi piece unit that includes the front monocoque and suspension. All the detail is there, including electrical boxes and fire bottles. I decided to add some detail to the interior.
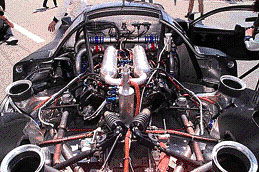
I drilled out the electrical connectors and added various colors of wiring. I sanded off the wire detail on the firewall and did the same. The seat is a Recaro racing unit. I added some PE seatbelts. I also added brake lines to the front calipers. The whole interior and front end builds up to one complete unit much like the real thing. Everything is the attached to the main chassis plate. The engine transaxle unit is very well detailed. The major fuel and coolant lines and radiators are satin chrome plated. I decided to detail the engine area as well. I had a lot trouble finding reference material for the R390.
I did finally find some engine shots on the Nissan home page. This was before this years Le Mans race so I don't know if the pictures are still there. The pictures were not very good so I had to use some artistic freedom in determining what goes where. Most of today's racecars have insulated oil and brake lines so I used various thickness of orange wiring to represent the lines. I also added the compression fittings at the end of each line. I masked and sprayed the engine area using Testors Model Master chrome silver.
|
|
Nissan Photos
The engine transaxle went into place without any troubles. I then added the radiators and turbo units to complete the rear area assembly. The wheels are satin chrome plated and are beautifully reproduced. The tires are typical Tamiya synthetic rubber units. There are no tire markings provided and no tire sponsor decals on the car. I sanded the tire treads and added valve stems for realism.The lighting fixtures are satin chrome plated and fit into place perfectly. You will have to black out parts of the front headlight buckets with flat black paint. All the lenses, including the rear lights, are molded in clear plastic. The rear lenses will require some detailed painting to make them look realistic. Tamiya has again provided a die cut masking seal for the windows so you do not have to mask the blacked out areas of the windows your self. These masks work great.
The body goes on with a bit of fidgeting but once in place fits real well. I then added the rear body piece and engine cover. I waxed the body before I put on all the small details, mirrors, wiper, Arial and headlight lenses. The kit builds up to a beautiful representation of the real car. The overall kit is well done and with a bit of extra work can be made to look outstanding. I rated my last review of the Tamiya Porsche GT1 an 11 out of 10. Because of the extra details, I will have to rate this one an 11.5!
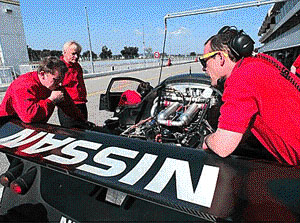
Nissan Photo