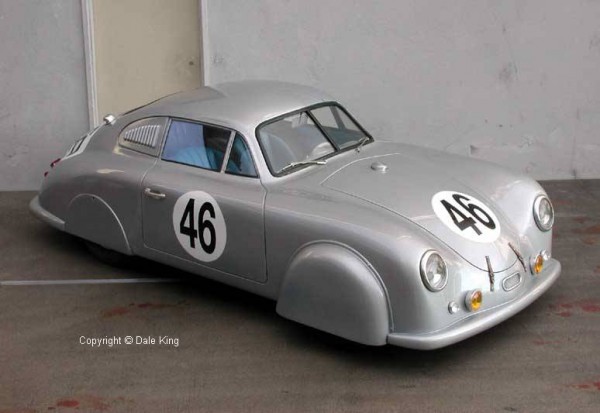
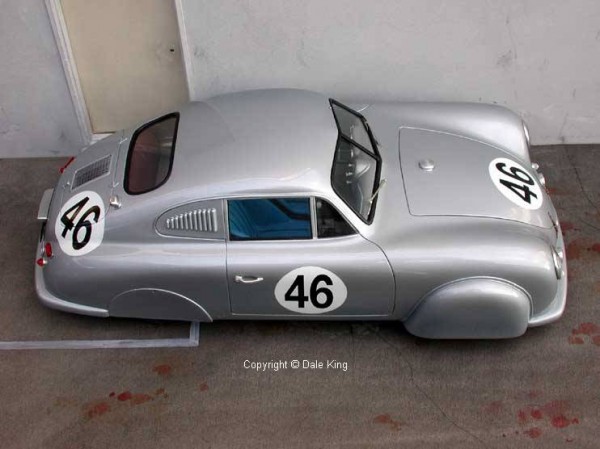
1/12 Porsche 356 Gmund SL
by Dale King
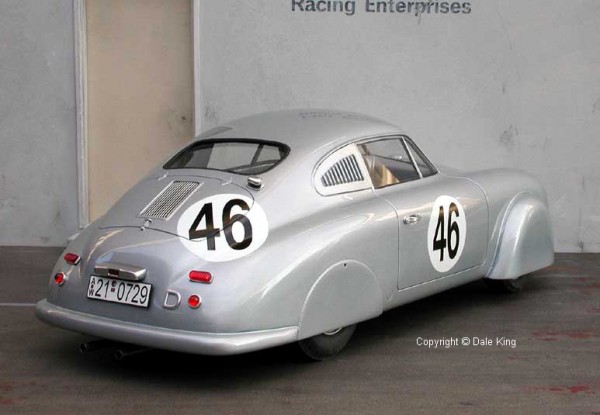
In 1951 the Porsche factory entered two aluminum bodied 356 Gmund SL 1.1 liter coupes in the 24 hours of Le Mans for the first time. The number 46 car driven by Veuillet/Mouche won its class and came in 20th overall. Uncounted motor sport successes would follow this victory. The name Gmund comes from the town in Austria where these first Porsches were built.
The kit, if you could call it that, was a great disappointment. I had bought the resin 1/12 scale Porsche 917 Pink Pig from the same manufacturer (the company shall remain nameless) some time before (it still isn’t finished), and I was very pleased with the shapes and quality of the castings. The Gmund, however, was obviously done by a completely different pattern and mold maker. Nothing fit or was the right shape. I was stunned. I had bought it from my good friend Motoi (Hapico), and he told me to “bring it back for a refund.” I would have, but the challenge was just too much to pass up. I knew I had to make it work. After all, this is a very important piece of Porsche history.
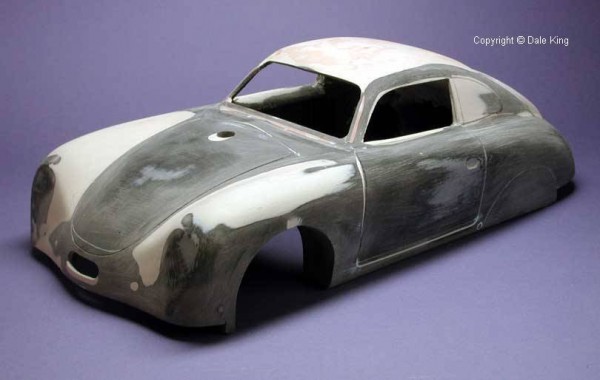
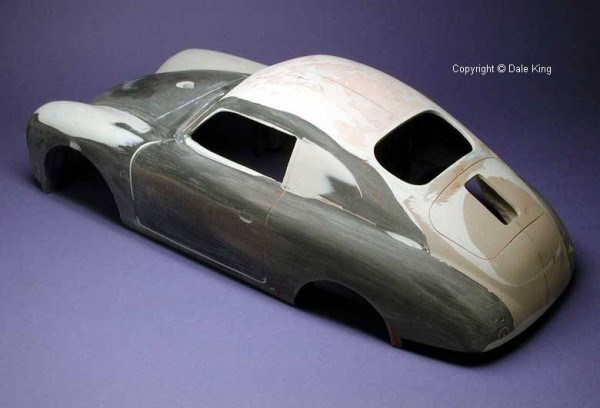
And so began the long task of turning a pile of resin into something that resembled the real car. I studied the body for about a week or two, decided there wasn’t much I could do with it, and so marched out to my garage, started up the band saw, and chopped it up. I ended up throwing most of the pieces away and what I did save was reshaped and heavily modified using Renshape, aluminum and bondo. New bumpers, new roof, new nose & tail, new front & rear ‘skirts’, new windows, new … well, just about everything. Someone said “wouldn’t it have been easier to start out with a block of Renshape?” and of course, in hindsight, the answer is “yes”.
I gathered all kinds of reference photos, even some I had shot myself, and dove into it. Over the next couple of years I cut, glued, shaped, sanded, primered, added and subtracted until I had something that better resembled a 1/12 scale Gmund coupe. The interior also had to be reworked quite a bit. I reshaped much of the basic insides then covered the floor, etc. with 3/4 ounce fiberglass cloth super glued into place to give the appearance of the burlap like material used on the early Porsches. The front seats were reshaped and painted the proper French blue while the upright portion of the rear jump seat was painted a reddish brown. The rest of the interior, except the dash which is silver, was painted a grayish tan.
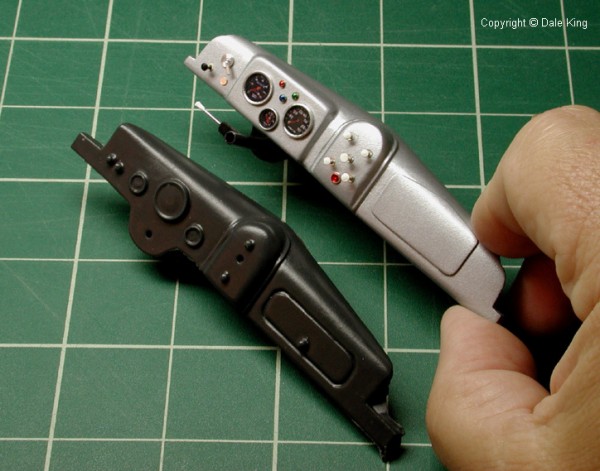
The dashboard, steering wheel and interior door panels & handles were then scratch built as the kit parts, where they existed, were useless. The ‘banjo’ steering wheel turned out to be quite a challenge, but I think the end results are acceptable. All of the exterior pieces (head and tail lights, front road lights, door handles, gas cap, number & license plate lights, front & rear grills, rear deck hinges & latch, etc. etc.) were scratch built in aluminum and clear Lucite. Only the p/e kit windshield wipers were used.
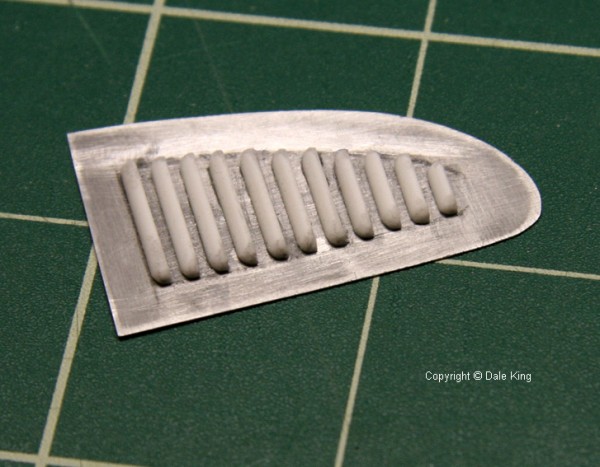
For the louvers on the rear quarter windows, I first cut sheet aluminum to fit the opening, and then cut and shaped the ends of quarter round Evergreen strip styrene and glued them in place. The rims were the best part of the kit, but of course you can’t see them. The tires were too large, and in order to get them to fit, I had to cut away most of the tops to get them under the bodywork.
After many coats of SEM high build primer, sanding between each layer, the body was ready for the final, much finer Tamiya primer.
I then shot two and a half cans of Tamiya mica silver (TS-76), and after that had cured for two weeks, two cans of Tamiya clear (TS-13). The clear was allowed to cure for a month and then I polished it out with the three Tamiya polishes.
As with most of the kit, the decals were unusable. I created new art for the numbers, dash board instruments and license plate in Illustrator on my computer and then printed them out on clear decal paper. I shot 4 or 5 very light coats of Krylon Crystal Clear over them and once dry I carefully cut them out and then reshot another light coat of clear. The reason for the last coat is to seal the cut edges so the water won’t seep in and cause the decals to smudge. The roundels were hand cut from sheets of MicroScale white decal paper. Although there are things here and there I’d like to change, I think the overall model came out quite nicely.
